
Have you ever wanted to make student feedback more personal and engaging, while at the same time speeding up the process? If so, SpeedGrader’s audio and visual comment options are just for you!
Enhancing Student Feedback Using Audio/Visual Features
Some benefits of audio/video feedback include:
- Improving student response to feedback.
- Making grading more efficient.
- Improving the instructor-student relationship. (Raiford, G. (n.d.))
The audio/video options are easy to use. Simply click the option of your choice and begin recording. The recording is made by Canvas using your computer’s microphone or camera.
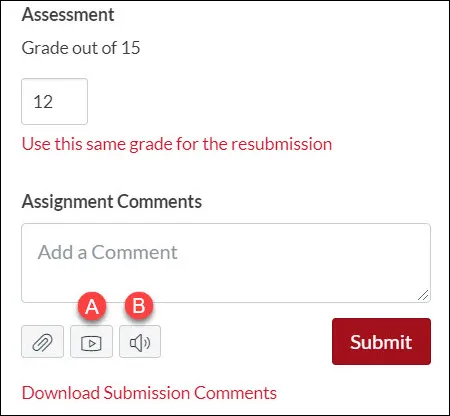
(B) Audio Option
There are several things to keep in mind when using audio/video feedback:
- Each Canvas course is allotted 2 gigabytes of storage. Audio/video feedback clips require more memory than written feedback, so limit this type of feedback to occasional rather than regular use. A good rule to follow is to keep your feedback to five minutes or less.
- Audio/video feedback is not accessible for all students. Make sure to write feedback for students who require it.
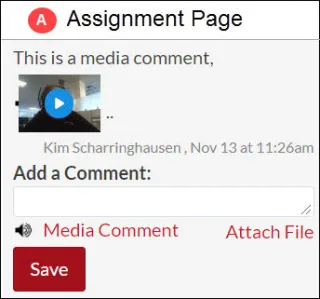
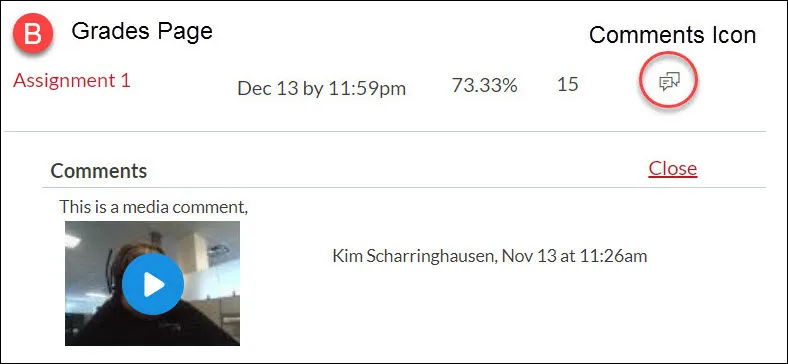
- After the assignment has been graded, students can access the audio/video comments in either the Assignment Page Comments area (A) or by clicking the Assignment comments icon on the Grades page (B).
- How to Use the New Gradebook
Reference: Raiford, G. (n.d.) Grading with recorded clips. Retrieved from teach.its.uiowa.edu/book/export/html/631
Related Articles
- How do I leave feedback comments for student submissions in SpeedGrader?
- How do I use Chrome’s speech recognition feature to leave a comment in Speed Grader?
Using the Canvas Scheduler for Student Appointments
Another tool to facilitate student engagement is the Canvas Scheduler. With this tool, students can register for appointments using the Calendar tool, located in the Global Navigation menu.
To create blocks of appointments, click the Calendar icon. Next, click the date on the Calendar for which you would like to set up the appointment blocks. In the Edit Event pop-up window, click the Appointment Group tab and complete the following fields:
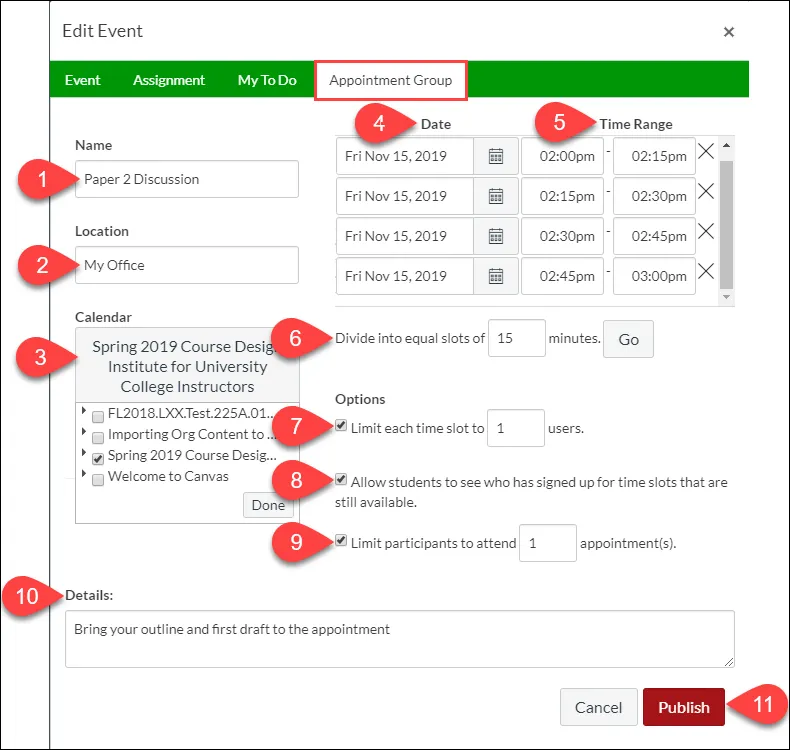
(5) Set Time Range (6) Set Appointment Time (7) Set Number of Users per Slot
(8) Allow students to see names of students who have appointments (9) Choose number of students per slot
(10) Enter Details about the appointment (11) Click the Publish button when you have finished
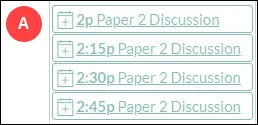
The appointment slots will appear on the instructor’s Calendar as shown in image (A). The slots will darken when they have been reserved by students.
Students will receive a Notification when appointment slots are created. Instructors will receive notifications when students sign up for appointments.
Related Articles
-
How do I add a Scheduler appointment group in a course calendar?
- How do I sign up for a Scheduler appointment in the Calendar? (For Students)
|
Office Hours Still Available Need help with your course or have questions about Canvas? Sign up for one-on-one assistance with our Instructional Specialist.
|
Reminders
|